CONTACT OX
TO LEARN MORE
Give us a call at 800-345-8881 or fill out the form below
and we’ll get back to you within two business days.
Do you ever feel a cold draft sneaking through your walls in the winter, or notice your air conditioner working overtime in the summer? These are the everyday signs of air leaks that can silently drive up energy bills and make indoor spaces uncomfortable.
Air leakage in walls, roofs, and around windows might seem harmless, but can lead to inconsistent indoor temperatures, moisture issues, and even higher utility bills. In fact, buildings can lose up to 30% of their heat or cool air through leaks alone, making airtight construction one of the simplest and most effective methods to save energy, money, and frustration.
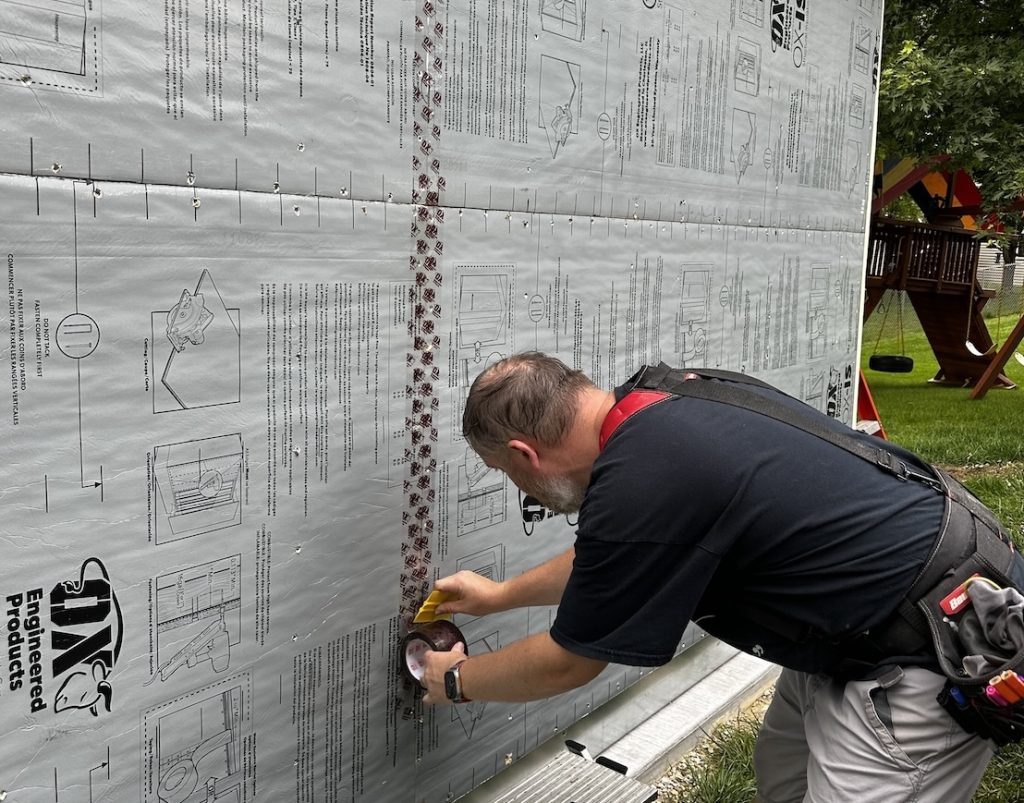
Proper installation and taping are key. Miss a seam, and a structure loses efficiency. Do it right, and your building performs like an energy-saving machine.
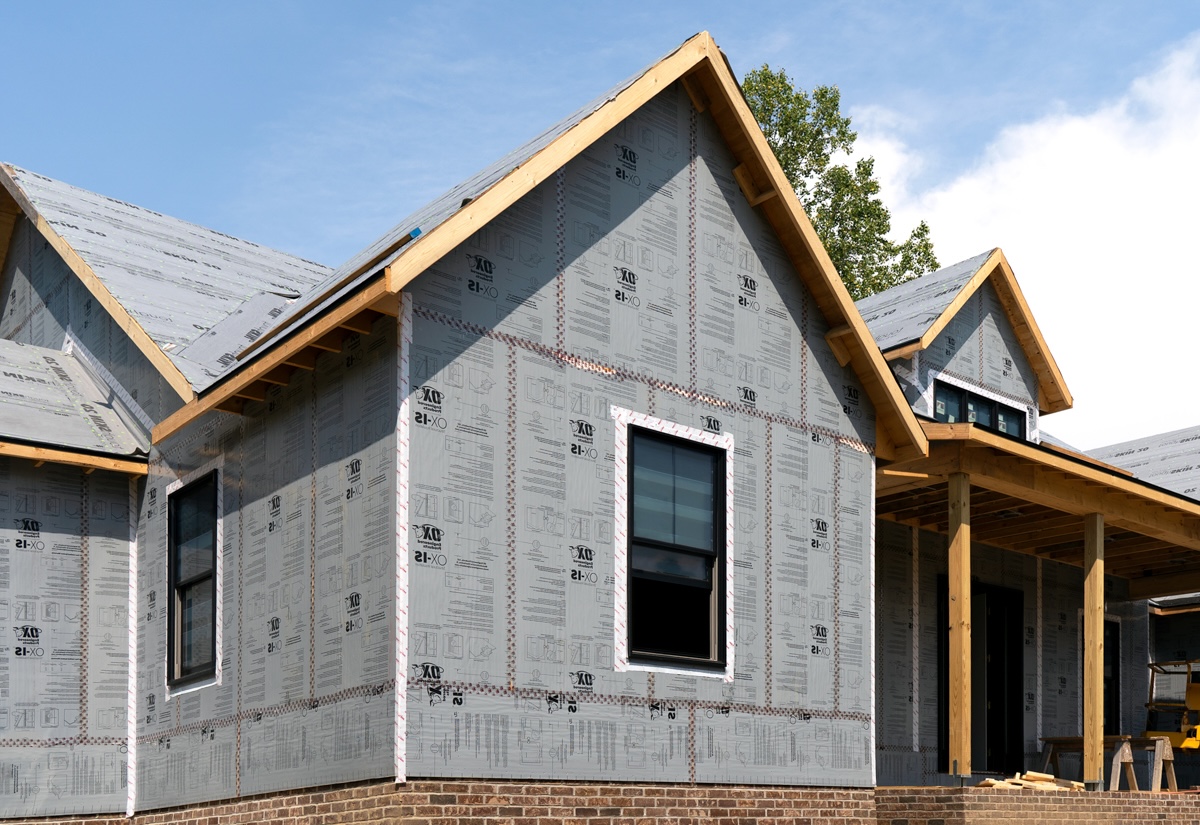
Why Insulated Sheathing Matters
Insulated sheathing isn’t just another layer in your walls, it’s a long-term investment in comfort, efficiency, and durability. By creating a continuous thermal barrier, it provides permanent energy efficiency, helping to lower heating and cooling costs for the life of the building. This means reduced strain on HVAC systems and meaningful energy costs savings for the entire life of a building.
Installing Insulated Sheathing the Right Way
When installing insulated sheathing, be sure to measure and cut each panel carefully. It’s important to decide if panels will lay horizontally or vertically, which will allow you to minimize seams and improve thermal performance upon installation. OX’s structural insulated sheathing panel, OX-IS, comes available in up to 10-foot lengths, enabling installers to sheath taller walls with fewer seams. This makes it well suited for today’s building and home construction standards that call for ceiling heights that often exceed eight feet.
Once cut, place each panel flush against the wall, making sure joints are tight with no intentional gaps. A snug fit strengthens a wall’s ability to resist thermal transmittance and keeps drafts at bay. If a panel shifts or wiggles, stop and adjust before moving on. It’s worth the extra moment to avoid energy loss over time. Think of it like fitting puzzle pieces: the cleaner the fit, the stronger the wall.
Top Three Installation Mistake to Avoid
The biggest mistakes with insulated sheathing are rarely due to a faulty product. The material is forgiving as long as fasteners are properly driven into studs, but problems occur when it’s installed like traditional OSB or plywood. For installers accustomed to those materials, old habits present themselves in three predictable and preventable mistakes.
1.) Leaving a 1/8-inch expansion gap – This is a common installation mistake that comes from treating insulated sheathing installation like OSB. Insulated sheathing is designed to be installed tight with no gaps to maintain a continuous thermal and air barrier. Even tiny cavities compromise performance.
2.) Penetration – HVAC, electrical, and plumbing runs must be carefully planned and sealed, and the insulated sheathing should never be used as a nail base for finishes like stucco, fiber cement, and other cladding systems.
3.) Apply pressure to activate adhesives – For tape to perform properly, panels need to be clean and dry, and the adhesive must be fully activated with firm, consistent pressure.
Building for the Long Haul
Installing insulated sheathing is one of the most effective ways to future-proof a building. While the process may require a shift away from old habits and traditional sheathing materials, the payoff is undeniable.
By prioritizing a tight fit, precise fastening, and pressure-activated seals, you aren’t just building another wall; you’re creating a high-performance building envelope. Taking these extra steps during installation ensures the structure remains energy-efficient, moisture-resistant, and comfortable for decades to come.